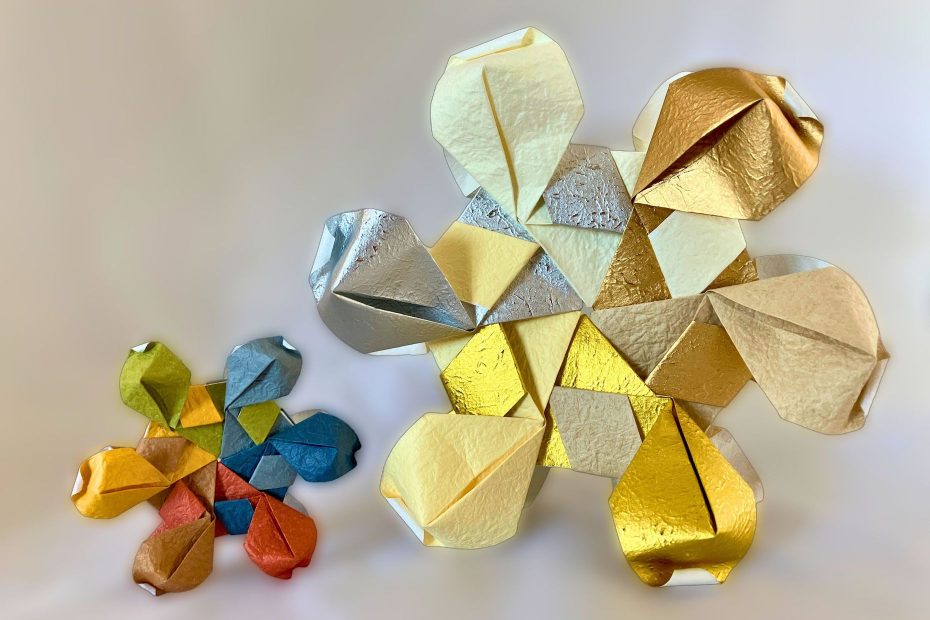
It is made from six squares of paper. Frangipani petals slightly overlap each other in a whorl. The way the sheets of paper interlock and overlap reminds of the natural presentation of this beautiful flower. Most frangipani only have five petals, but some do have six :)
Trucs et astuces d’experts
Pour ce projet, j’ai utilisé du papier momi avec un dos blanc. En réalité, vous pouvez utiliser n’importe quel papier pour ce projet, mais sachez que le verso sera partiellement visible au niveau des bords recourbés et à l’arrière des pétales. Si vous souhaitez réaliser un mobile, vous pouvez enfiler ces fleurs ensemble, fabriquer vous-même une structure, ou en acheter une, par exemple un mobile porte-photos.
Matériel requis frangipanier modulaire à six pétales
• 6 carrés de papier de votre choix (j’ai utilisé du papier momi) • aiguille et fil (facultatifs, pour un mobile) • structure de mobile préfabriquée (facultative, par exemple en métal ou faite maison)
Instructions frangipanier modulaire à six pétales
Step 1
Start with a square of paper.
Step 2
Complete steps 2-5 of the 12 petal kusudama. If you are using paper with one side coloured and one side blank, make sure the coloured side remains on the outside of the triangle base.
Step 3
Fold the point of the model down to the bottom edge in the middle.
Step 4
Unfold so you can clearly see the fold line you just created.
Step 5
Fold downwards, aligning the fold you just created with the bottom edge of the model.
Step 6
Open the model up completely and carefully accordion fold one mountain fold along the line you just created and one valley fold along the edge from the previous step.
Step 7
Collapse the model along the accordion folds so that the point faces upward.
Step 8
Fold a total of six units. Interlock a second unit with the first so that the layers of paper of the two units alternate.
Step 9
Fold the top layer of the underneath unit down as far as it will go in line with the edge of the unit on top.
Step 10
Now tuck the edge of this flap of paper into the pocket of the unit underneath it. You will have to pleat the bottom point slightly to align the fold with the edge of the bottom unit’s pocket.
Step 11
Repeat steps 9-10 on the back by flipping over the two interlocking units. Then, add on the remaining four units, repeating step 8-10 for each additional unit you add on. With the addition of the sixth unit, you will have to ensure the layers of paper correctly alternate to look like this on both sides.
Step 12
Partially squash fold the first petal into a 3D shape. Carefully pull open the upper layer of paper as far as it will go while keeping the bottom of the petal in position. Fold the left edge of the petal in line with the edge of the multiple layers of paper inside.
Step 13
Repeat step 12 for all petals on both sides of the model.
Step 14
Curl the edges of all petals inwards on both sides of the model, using a needle or other thin implement, or just with your fingers.
Step 15
If you want to hang the model, use a needle and thread to sew through multiple layers of the model where the inner ‘hexagon’ is created, being careful not to sew through any of the petals.